Introduction | Tank – How to | Tank – Examples | Atmospheric- Examples | Theory | Wiki
We take two clear open rectangular tanks, one of which fits snugly in to the other. The larger tank should be perhaps 3 inches deep and twice as wide as the smaller box and somewhat taller. The dimensions shown in Fig.1 work well.
Fig. 1: Side-view sketch of the inner and outer containers showing level of fluid and the position of the two holes. The outer contained is about 3 inches deep.
The smaller tank has two 1/2 inch diameter holes cut in its side, one near the bottom and the other near the top, as can be seen in Fig. 2.

Fig. 2: The inner and outer containers viewed at an angle. The holes are indicated by the red circles
Position the smaller box inside the larger one with the holes facing in to the larger tank, as shown in Fig. 2. For recording and projection purposes, the system can be placed on the rotating table and a side view obtained via the overhead camera using a tilted mirror as shown in the Fig.3. (Note – normally the experiment is carried out without rotation!)
Fig.3 Through use of a mirror, the experiment can be recorded or projected using the overhead camera.
Fill both containers with room temperature water until the equilibrium level is midway through the top hole of the smaller box. It is best to begin filling the smaller tank first. After some time the water will settle down to a state of rest in which the fluid is at the same level in each compartment. To view the experiment more clearly, we can attach a back-lit white sheet to the back of the large container using a clamp, as shown in Fig. 4.
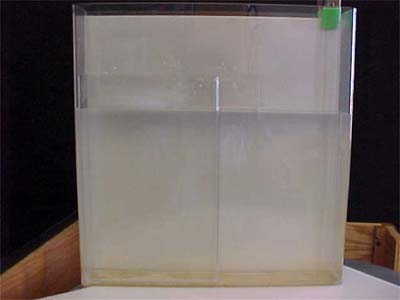
Fig. 4: Containers filled with water with a white back screen for viewing purposes. The surface of the water passes through the middle of the upper hole
We now prepare a salt solution by pouring three tablespoons of salt into a 150 ml beaker and then adding room temperature water until we have roughly 100 ml salt solution. Saturation point at room temperature should occur around a density of 1.05 g/ml compared with pure water at 1.00 g/ml. Stir until the salt has dissolved and then add dye (we chose blue) until the solution is nearly black.
Once the above steps are completed, rapidly (but carefully!), pour the dyed salt solution into the small container and quickly mix evenly with a rod. The state of affairs early in the experiment is shown in Fig. 5 (left). Since the salty, dyed water is denser than the fresh, clear water, it will flow through the lower hole in to the fresh water compartment. The hole at the top allows the fresh water to flow into the salty compartment replenishing the salty fluid that has drained away at the bottom.
This process continues for 15 minutes or so, until equilibrium is reached as shown in Fig. 5 (right).
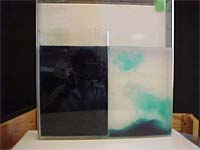
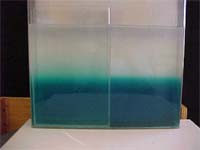
Fig. 5: To the left is the experiment at the start and to the right is the equilibrium state which is reached after several minutes of diffusion